


Read Time:7 Minute, 50 Second
You’ve probably heard the buzz about Passive House—those ultra-efficient new builds that barely need heating or cooling. But what if you’re not building from scratch? What if you’re stuck with a drafty old Victorian or a leaky 1970s ranch? Well, here’s the good news: you can absolutely apply Passive House principles to existing homes. It’s not easy, sure—but it’s totally doable. And honestly, it might be the smartest renovation you’ll ever make.
Wait, What Exactly Are Passive House Principles?
Let’s back up a second. Passive House (or Passivhaus, if you’re feeling fancy) is a rigorous building standard that focuses on five core principles: super-insulation, airtightness, high-performance windows, thermal bridge-free construction, and mechanical ventilation with heat recovery (MVHR). The goal? Slash energy use by up to 90% compared to a typical home. But here’s the kicker—it’s not just about saving money. It’s about comfort. No drafts. No cold spots. No mold. Just a cozy, quiet, healthy home.
Now, applying these to an existing home? That’s where the magic—and the challenge—happens. You can’t just slap on some insulation and call it a day. You need a strategy. A plan. And maybe a little patience.
Principle #1: Super-Insulation (Without Tearing Everything Down)
Insulation is the backbone of Passive House. For new builds, you can go wild with thick walls. For existing homes… well, you’ve got constraints. But there’s a workaround: external insulation. You know, wrapping the whole house in a thick blanket of foam or mineral wool. It’s like putting a winter coat on your home.
Sure, it changes the look—your windows might sit deeper, and you’ll need new cladding. But the payoff? No more cold walls. No more heat bleeding out through the brickwork. And you can often do it in stages. Start with the north-facing wall, then the rest. Just make sure you’re using at least 8 to 12 inches of insulation—yes, that much—to hit Passive House levels. Pro tip: Use rigid foam boards or wood fiber for breathability.
What About Internal Insulation?
Internal insulation is an option—especially for historic homes where you can’t mess with the facade. But it’s tricky. You lose floor space. You risk condensation issues if you don’t get the vapor barrier right. Honestly, it’s a bit like trying to insulate a freezer from the inside. Doable, but you’ve gotta be meticulous. Always use a vapor-open system to let walls breathe.
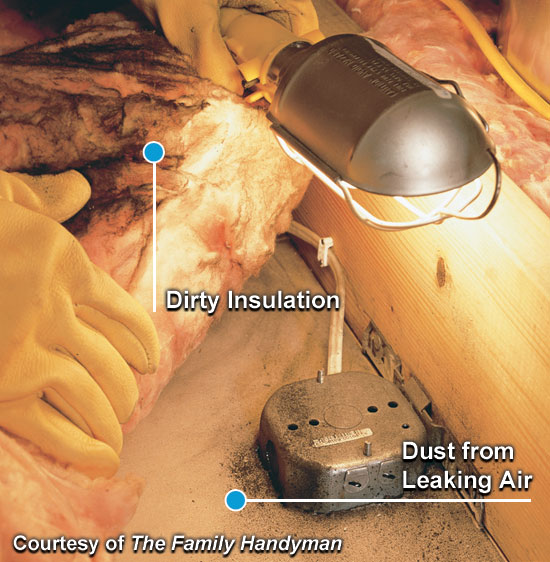
Principle #2: Airtightness—The Leaky House’s Nemesis
Here’s where most older homes fail spectacularly. All those gaps around windows, cracks in the foundation, holes for pipes—they’re like leaving a window open all winter. Passive House demands airtightness. For an existing home, that means a serious air-sealing mission.
Start with a blower door test. It’s a fan that depressurizes your house, revealing every leak. Then, seal them up. Use caulk, spray foam, and special tapes. Pay special attention to the attic floor, rim joists, and around electrical outlets. You want an air change rate under 0.6 ACH at 50 Pascals—that’s the Passive House gold standard. For context, a typical old home might be 10 or 20 ACH. Yeah, it’s a big jump.
But don’t panic. You don’t have to hit that number overnight. Even getting down to 3 or 4 ACH will transform your comfort. And you can always improve later.
Principle #3: High-Performance Windows—The Eyes of Your Home
Windows are the weak link in most homes. Single-pane? Double-pane with aluminum frames? They’re basically thermal sieves. Passive House windows are triple-glazed, with insulated frames and low-e coatings. They let in solar heat but keep the cold out.
For an existing home, replacing windows is a big investment. But you don’t need to do all at once. Start with the north side—where heat loss is worst. Or, if your windows are in decent shape, consider secondary glazing. It’s like adding a storm window inside—cheaper, less invasive, and surprisingly effective. Just make sure the gap between panes is at least 2 inches for real benefit.
And here’s a quirk: Passive House windows often have a U-value below 0.8 W/m²K. That’s way better than standard. But installation matters more than the glass. If you don’t seal the frame airtight, you’ve wasted your money. Always tape the window-to-wall connection.
Principle #4: Eliminate Thermal Bridges
Thermal bridges are spots where heat escapes through a conductive material—like a concrete balcony, a steel beam, or even a brick wall corner. In old homes, they’re everywhere. The trick is to break them.
For existing homes, you can’t always remove the bridge. But you can cover it. Use continuous external insulation to wrap around corners and overhangs. For balconies, consider a thermal break—a special connector that separates the indoor from outdoor structure. It’s a bit like putting a rubber gasket between two metal parts. Sounds small, but it makes a huge difference.
And don’t forget the foundation. A cold slab can suck heat right out of your floor. Insulate the perimeter of the slab, or add rigid foam under a new floor finish. Every degree of warmth you keep inside is a degree you don’t pay for.
Principle #5: Mechanical Ventilation with Heat Recovery (MVHR)
This is the secret sauce. Once you make your home airtight, you can’t open a window for fresh air—well, you can, but it defeats the purpose. That’s where MVHR comes in. It’s a system that constantly brings in filtered fresh air and exhausts stale air, while recovering up to 90% of the heat. Think of it as your home’s lungs.
For an existing home, installing MVHR can be messy. You need ducts running through ceilings or walls. But there are retrofit-friendly options: compact units that fit in a closet, or even decentralized systems (one per room). Honestly, the comfort is worth the hassle. No more condensation on windows. No more stuffy bedrooms. And the air quality? Chef’s kiss.
Just make sure to size the system correctly—oversizing leads to noise and drafts. And filter changes? They’re like changing your car’s oil. Annoying, but necessary.
The Retrofit Reality Check
Let’s be real: retrofitting an existing home to Passive House standards is a journey, not a sprint. It’s expensive upfront—think $50,000 to $100,000 for a full deep retrofit. But the energy savings over 20 years can easily recoup that. Plus, you get a home that’s quieter, healthier, and more resilient to climate change. And with rising energy prices, it’s practically a hedge against inflation.
Some people do it step by step. First, air seal and insulate the attic. Then, upgrade windows. Then, add external insulation. Then, install MVHR. Each step improves comfort. Each step cuts your energy bill. It’s not all-or-nothing.
A Quick Table: Passive House vs. Typical Retrofit
| Feature | Typical Home | Passive House Retrofit |
|---|---|---|
| Insulation (walls) | 2-4 inches | 8-12 inches |
| Airtightness (ACH50) | 5-15 | Below 0.6 |
| Window U-value | 1.5-2.5 W/m²K | Below 0.8 W/m²K |
| Ventilation | Leaky windows | MVHR with heat recovery |
| Energy savings | 20-40% | 70-90% |
See the gap? It’s huge. But every inch of insulation, every sealed crack, every triple-glazed window—they all add up. And you don’t have to do it all at once. Start with the low-hanging fruit: air sealing and attic insulation. That alone can cut your heating bill by 30%.
Common Pitfalls (And How to Avoid Them)
I’ve seen folks go all-in on Passive House retrofits and hit some nasty surprises. Here’s a few to watch for:
- Moisture problems: If you seal up a house without proper ventilation, you get mold. Always plan for MVHR or at least controlled exhaust fans.
- Overheating: Super-insulated homes can trap heat in summer. Use shading, overhangs, or low-e coatings on south-facing windows.
- Cost overruns: Retrofits always cost more than you think. Budget a 20% contingency.
- Historic restrictions: Some neighborhoods won’t let you change windows or add external insulation. Check local codes first.
But honestly, these are solvable. Work with a certified Passive House designer—they’ve seen it all. And don’t be afraid to ask questions. Like, “Will this make my house smell like a sealed Tupperware container?” (Spoiler: No, if you get the ventilation right.)
The Big Picture: Why Bother?
You might be thinking, “Why go through all this trouble for an old house?” Well, think about it. We’re not building new homes fast enough to solve the climate crisis. The greenest building is the one already standing—if we make it efficient. Retrofitting existing homes to Passive House standards is one of the most impactful things we can do. It cuts carbon emissions, reduces strain on the grid, and makes your home a sanctuary.
Plus, there’s something deeply satisfying about turning a leaky old house into a fortress of comfort. You know that feeling when you walk into a room and it’s perfectly warm, with no drafts, no noise? That’s the Passive House promise. And it
Happy
0 %
Sad
0 %
Excited
0 %
Sleepy
0 %
Angry
0 %
Surprise
0 %